How you can replace heads on a broken HDD independently
It is difficult to surprise someone with the news about inoperative HDD in general and the 11th, 12th and ES.2. versions of Seagate Barracuda in particular.
Many people know that the HDD repeated breakdown problem is caused by the microprogram failure.
Strictly speaking, I wrote about it a year ago. However, not everyone knows that the true reason of the specified HDD constant shut down lies in the hardware low quality, especially the read-write head failure.
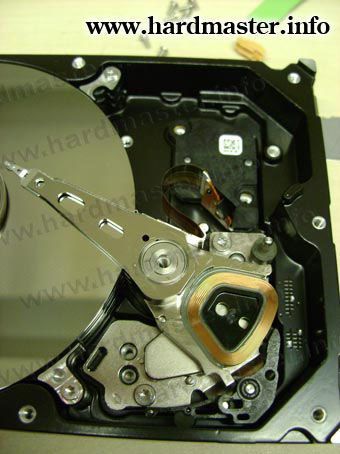
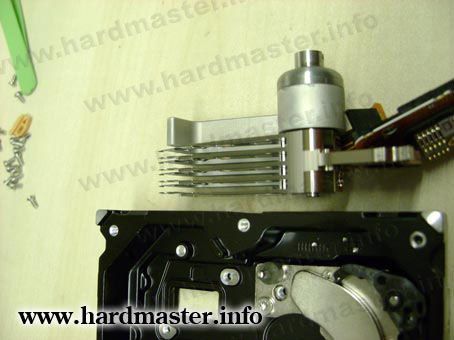
 Faulty heads of 7200.11 Seagate Barracuda
"Seagate" posted a program "patch" on its web site. The users started to download it being sure that now nothing threatened their discs and data on them. But it was not to be so. The "patch" is called exactly a patch as it doesn't eliminate the problem cause but just moves it aside for an indefinite period. And this indefinite period often becomes definite and the problem becomes more serious. As a result, the data recovery centers received reprogrammed "Seagate" HDDs, with stuck voice coil motors, knocking and crepitating, that had completely failed. Most of them had inoperative heads either with external defects on its surface or with the positioner unusually knocking against the stopper.
It is obvious that one should replace a faulty head stack to a similar one, removed from an operative HDD, to recover data on HDD with faulty head stack. Those from power users try to perform it themselves and bring their discs to the service with opened up containment, with foreign heads, often with surface scratches, and all these problems significantly increase the data recovery cost.
Later I will explain how to replace the faulty HDD head stack on the basis of Seagate Barracuda 7200.11 with the volume 1 Tb. First of all, works inside the containment should be performed with no suspended dust particles in the air. Clean rooms, clean zones and clean boxes can provide such conditions. In extreme case, such a zone can be created by yourself, if you fit it out with the ventilation and dust collectors system.
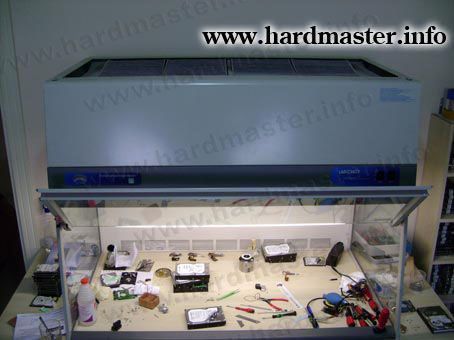 Clean zone for work in HDD containment
The clean zone for performing this work is depicted on the photo. It is fitted out with replaceable filters in the upper section and clean air constant recirculation. The box itself with a clean zone created is also fitted out with the ventilation and dust collectors system. Then, you also need special tools starting with screws and pliers up to the magnets and head stack pulling bolt.
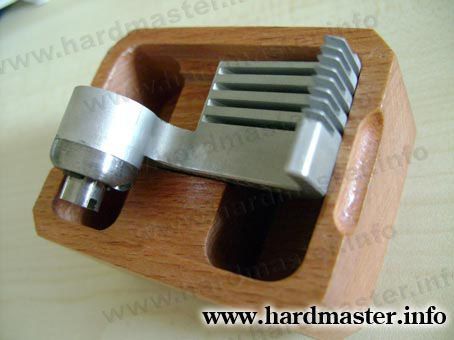 The head pulling bolt for 7200.11 and ES.2 versions of Seagate HDD
 The photo of the package pulling bolt is supplied in
And the process of the head stack assembly removal is described below. You should use only such tools for the heads replacement as they allow removing heads from LZn directly without jamming neither reading elements nor its surface. And what is more important, such a pulling bolt allows avoiding the heads microelements splicing with each other.
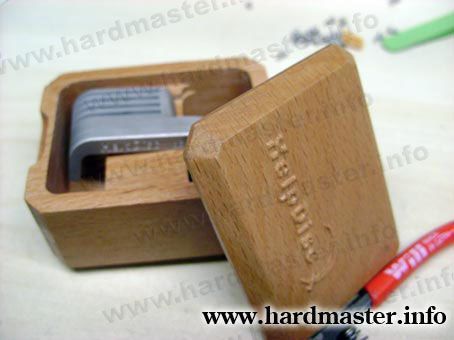
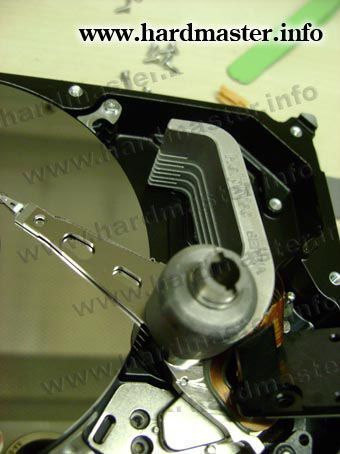
 Remove magnet
With the special tool I removed and reinstalled the magnet after the head stack replacement.
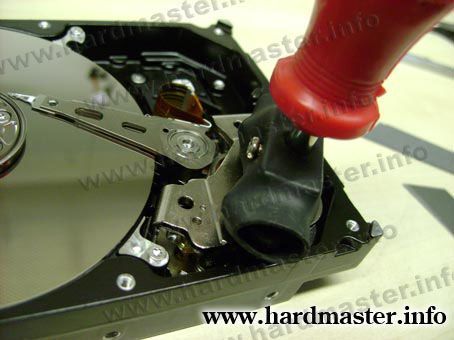
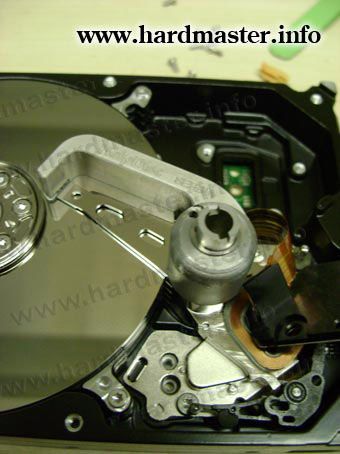
 Everything is ready for the head stack replacement
After the containment preparation for the pulling bolt installation you can go to the most important part of the operation on the efficient heads removal.
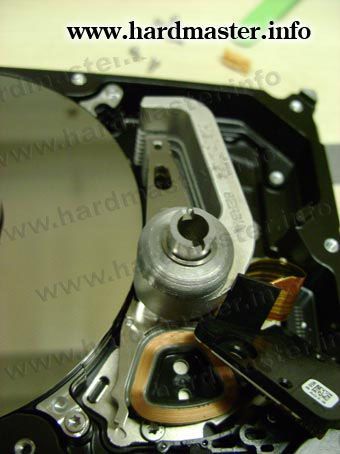
 The heads pulling bolt is installed in the containment
 Move the pulling bolt under heads in the parking zone
 The heads have been moved beyond platters
 The heads have been removed successfully
The removed operative heads assembly should be reinstalled in the reverse order.
I also strongly recommend you to use an optical or electronic microscope for the removed inoperative heads inspection. The fine dust or metallic chips (even worse!) on its surface indicate the scratches on the platters concealed from visual inspection. If so, it's better to delay the promiscuous donor heads assembly installation.
 The repair has been performed successfully
I have 18 machines with these WD4000KS units as an extra storage volume. Over half have completely failed and the others show errors. I have 78 machines in our operation and these drives are the ONLY hardware failures in the last year. I cant find many who have the same issue but the numbers dont lie, theres somthing terribly wrong with these drives.
hi does this tool work for seagate drive 5400.4 160 gb's
this tool is only for 3,5" cases
Hello Robin , I am very much impressed by , your all data recovery articles. There are 2 queries 1. After doing Seagate Head Replacement (F3arch) , most of the time Donar head does not work. I match all parameters , Model , firmware , date code , site code. What could be the reason ? I also work in Clean room box with 0.3mn. Please Guide me . Thank you Nainesh
For a successful head replacement need to take head assembly with the matching adaptive parameters and also wanna be sure about no scratches on the surfaces.
Hello sir, I am Ramesh from india. How to math donor for Seagate hard drive. I am trying with same model, fw, site code but not any success. can you help me in this. my email is (hide) kindly help me. Thanks
Compatible heads spare parts must be has compatible adaptives.